Gyoza 站内搜索迁移到 PageFind 已经有段时间了,之前使用的 Algolia DocSearch 随着域名迁移也在发邮件提醒无法爬取,所以趁着有点空闲决定还是重新使用 DocSearch。
申请开通 DocSearch
DocSearch 的服务已经遍布了各大框架文档站点,关键字匹配、搜索效率都很好。整个搜索服务虽然免费提供,但是需要满足一些基础条件,属于有门栏的免费
申请条件
- 申请的站点属于技术文档或技术博客
- 申请者是网站的所有者或者至少拥有代码调整的权限
- 申请的网站必须是公开可用的
- 申请的网站必须已经拥有了一定的内容,不做空索引
整体限制条件还是比较宽松的,在 DocSearch Apply 上填写请求索引的网站 URL 以及邮箱地址发起申请。
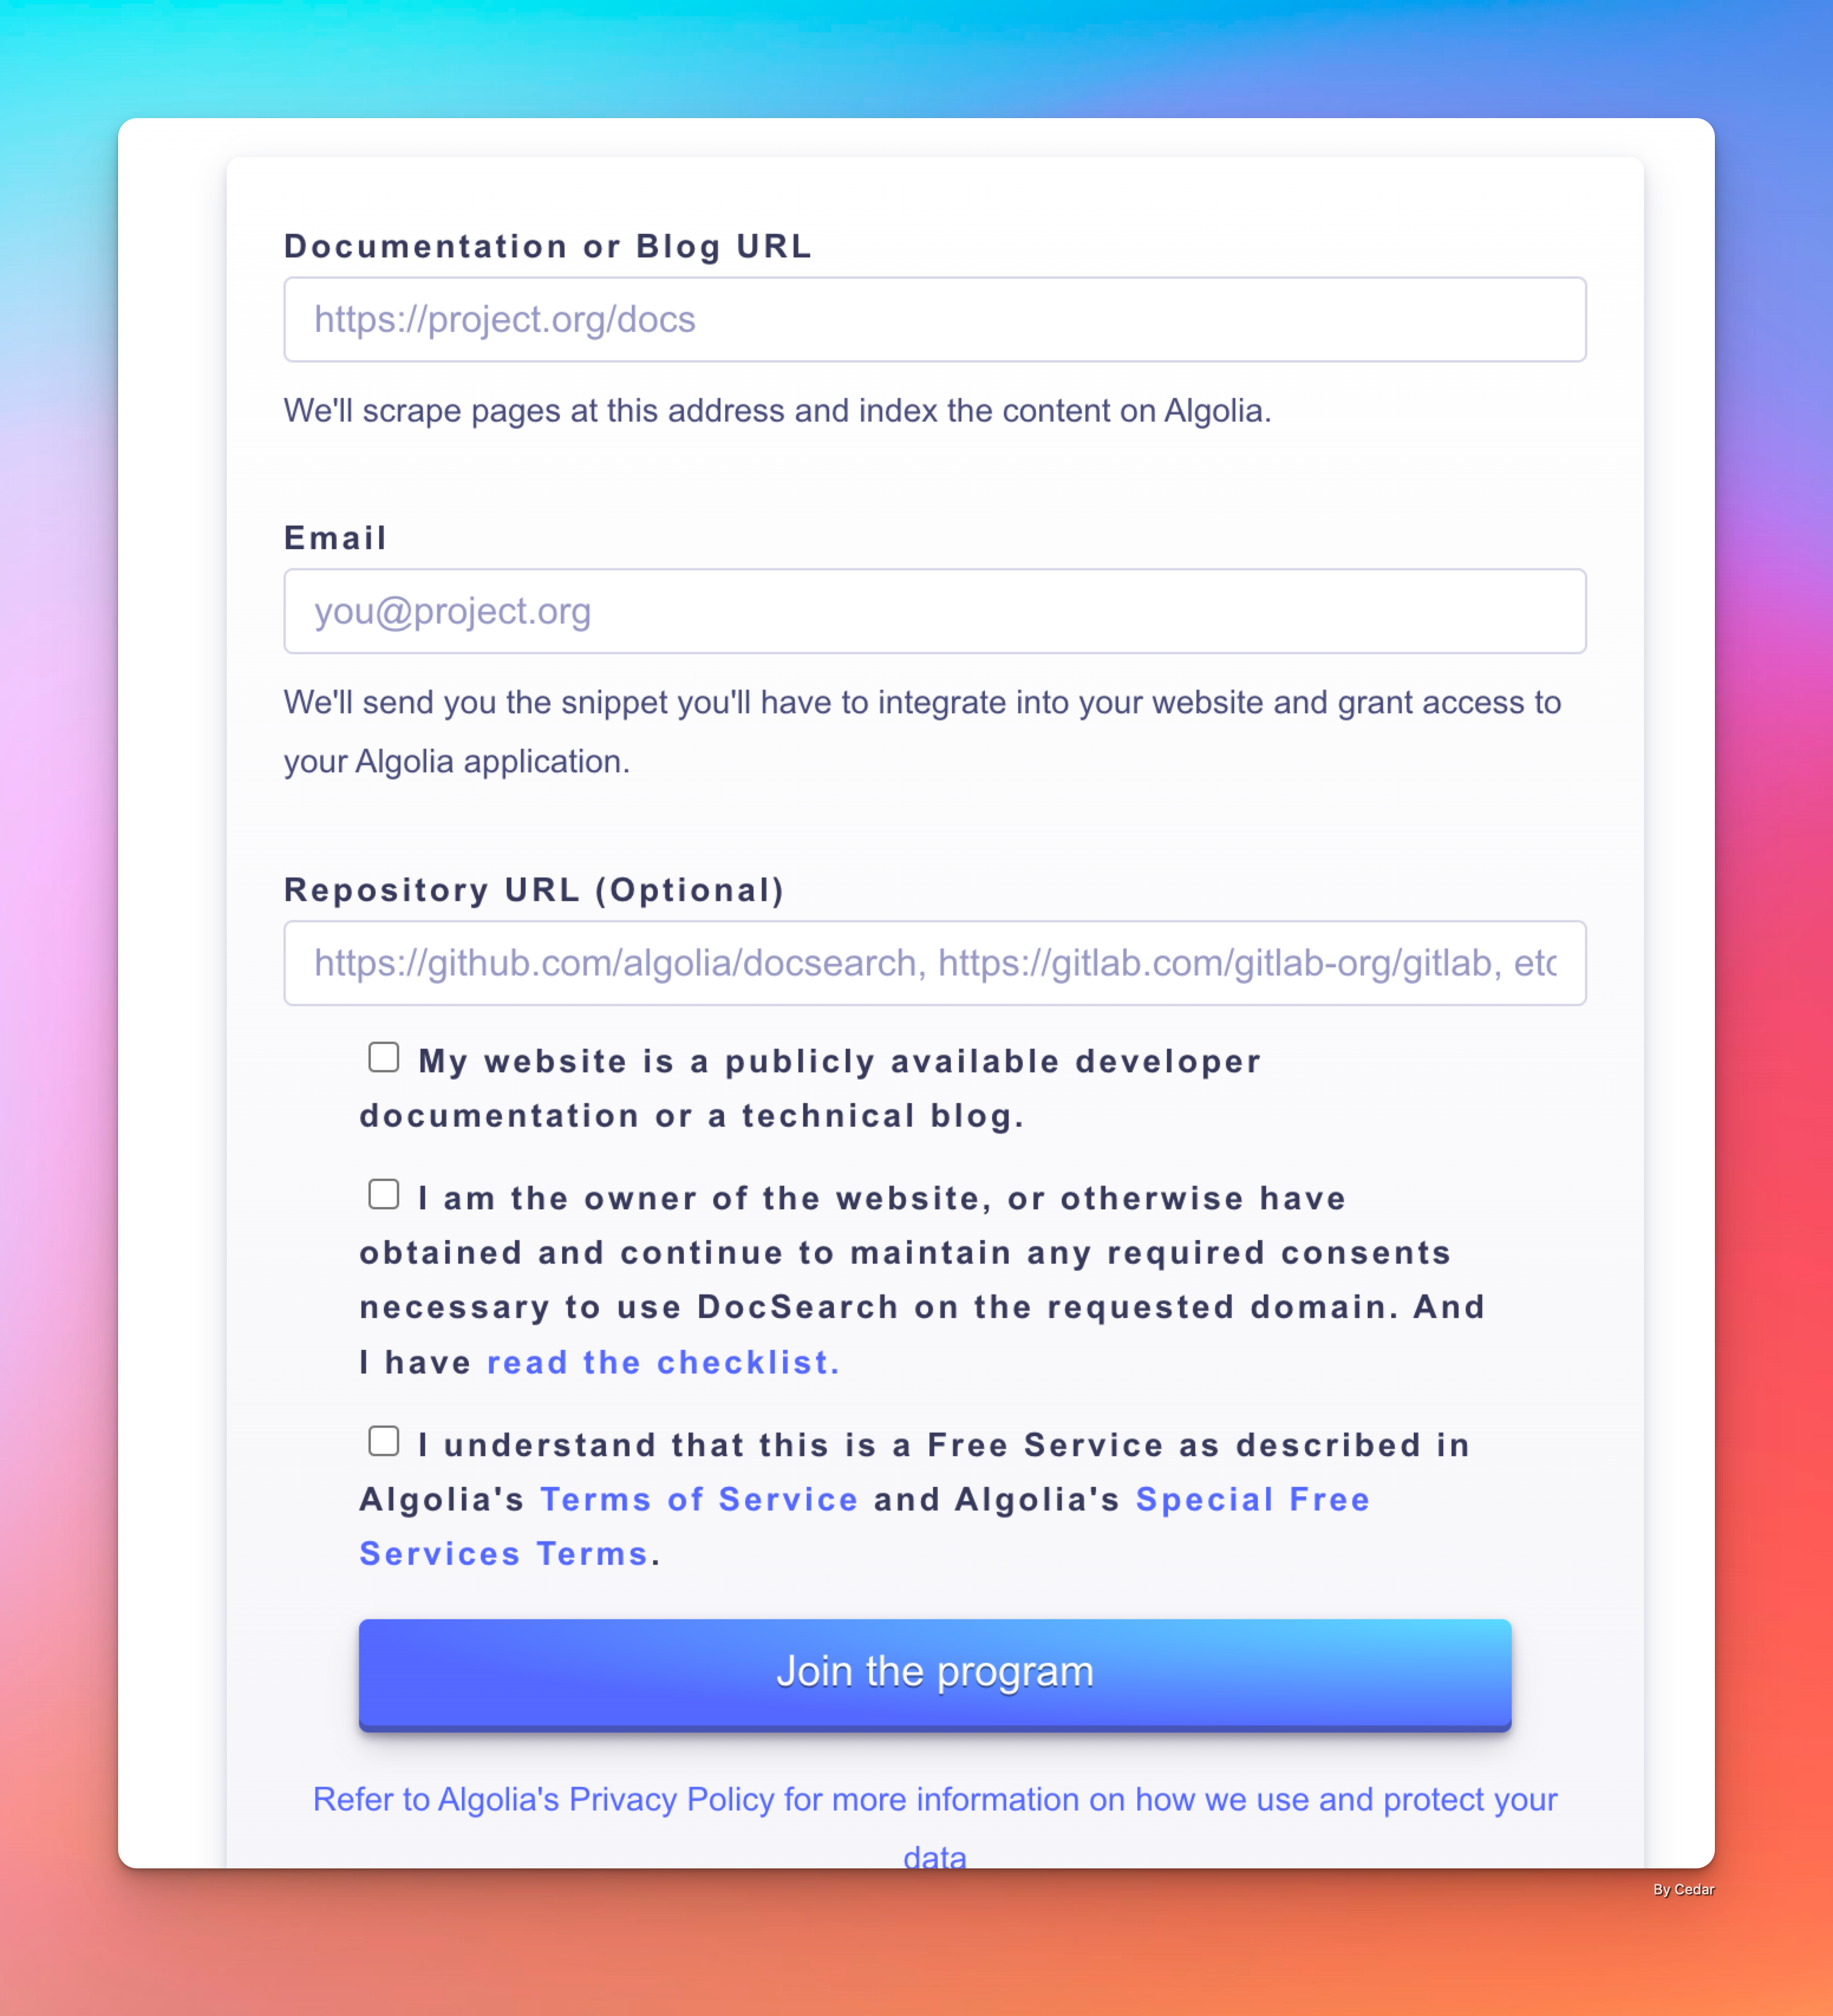
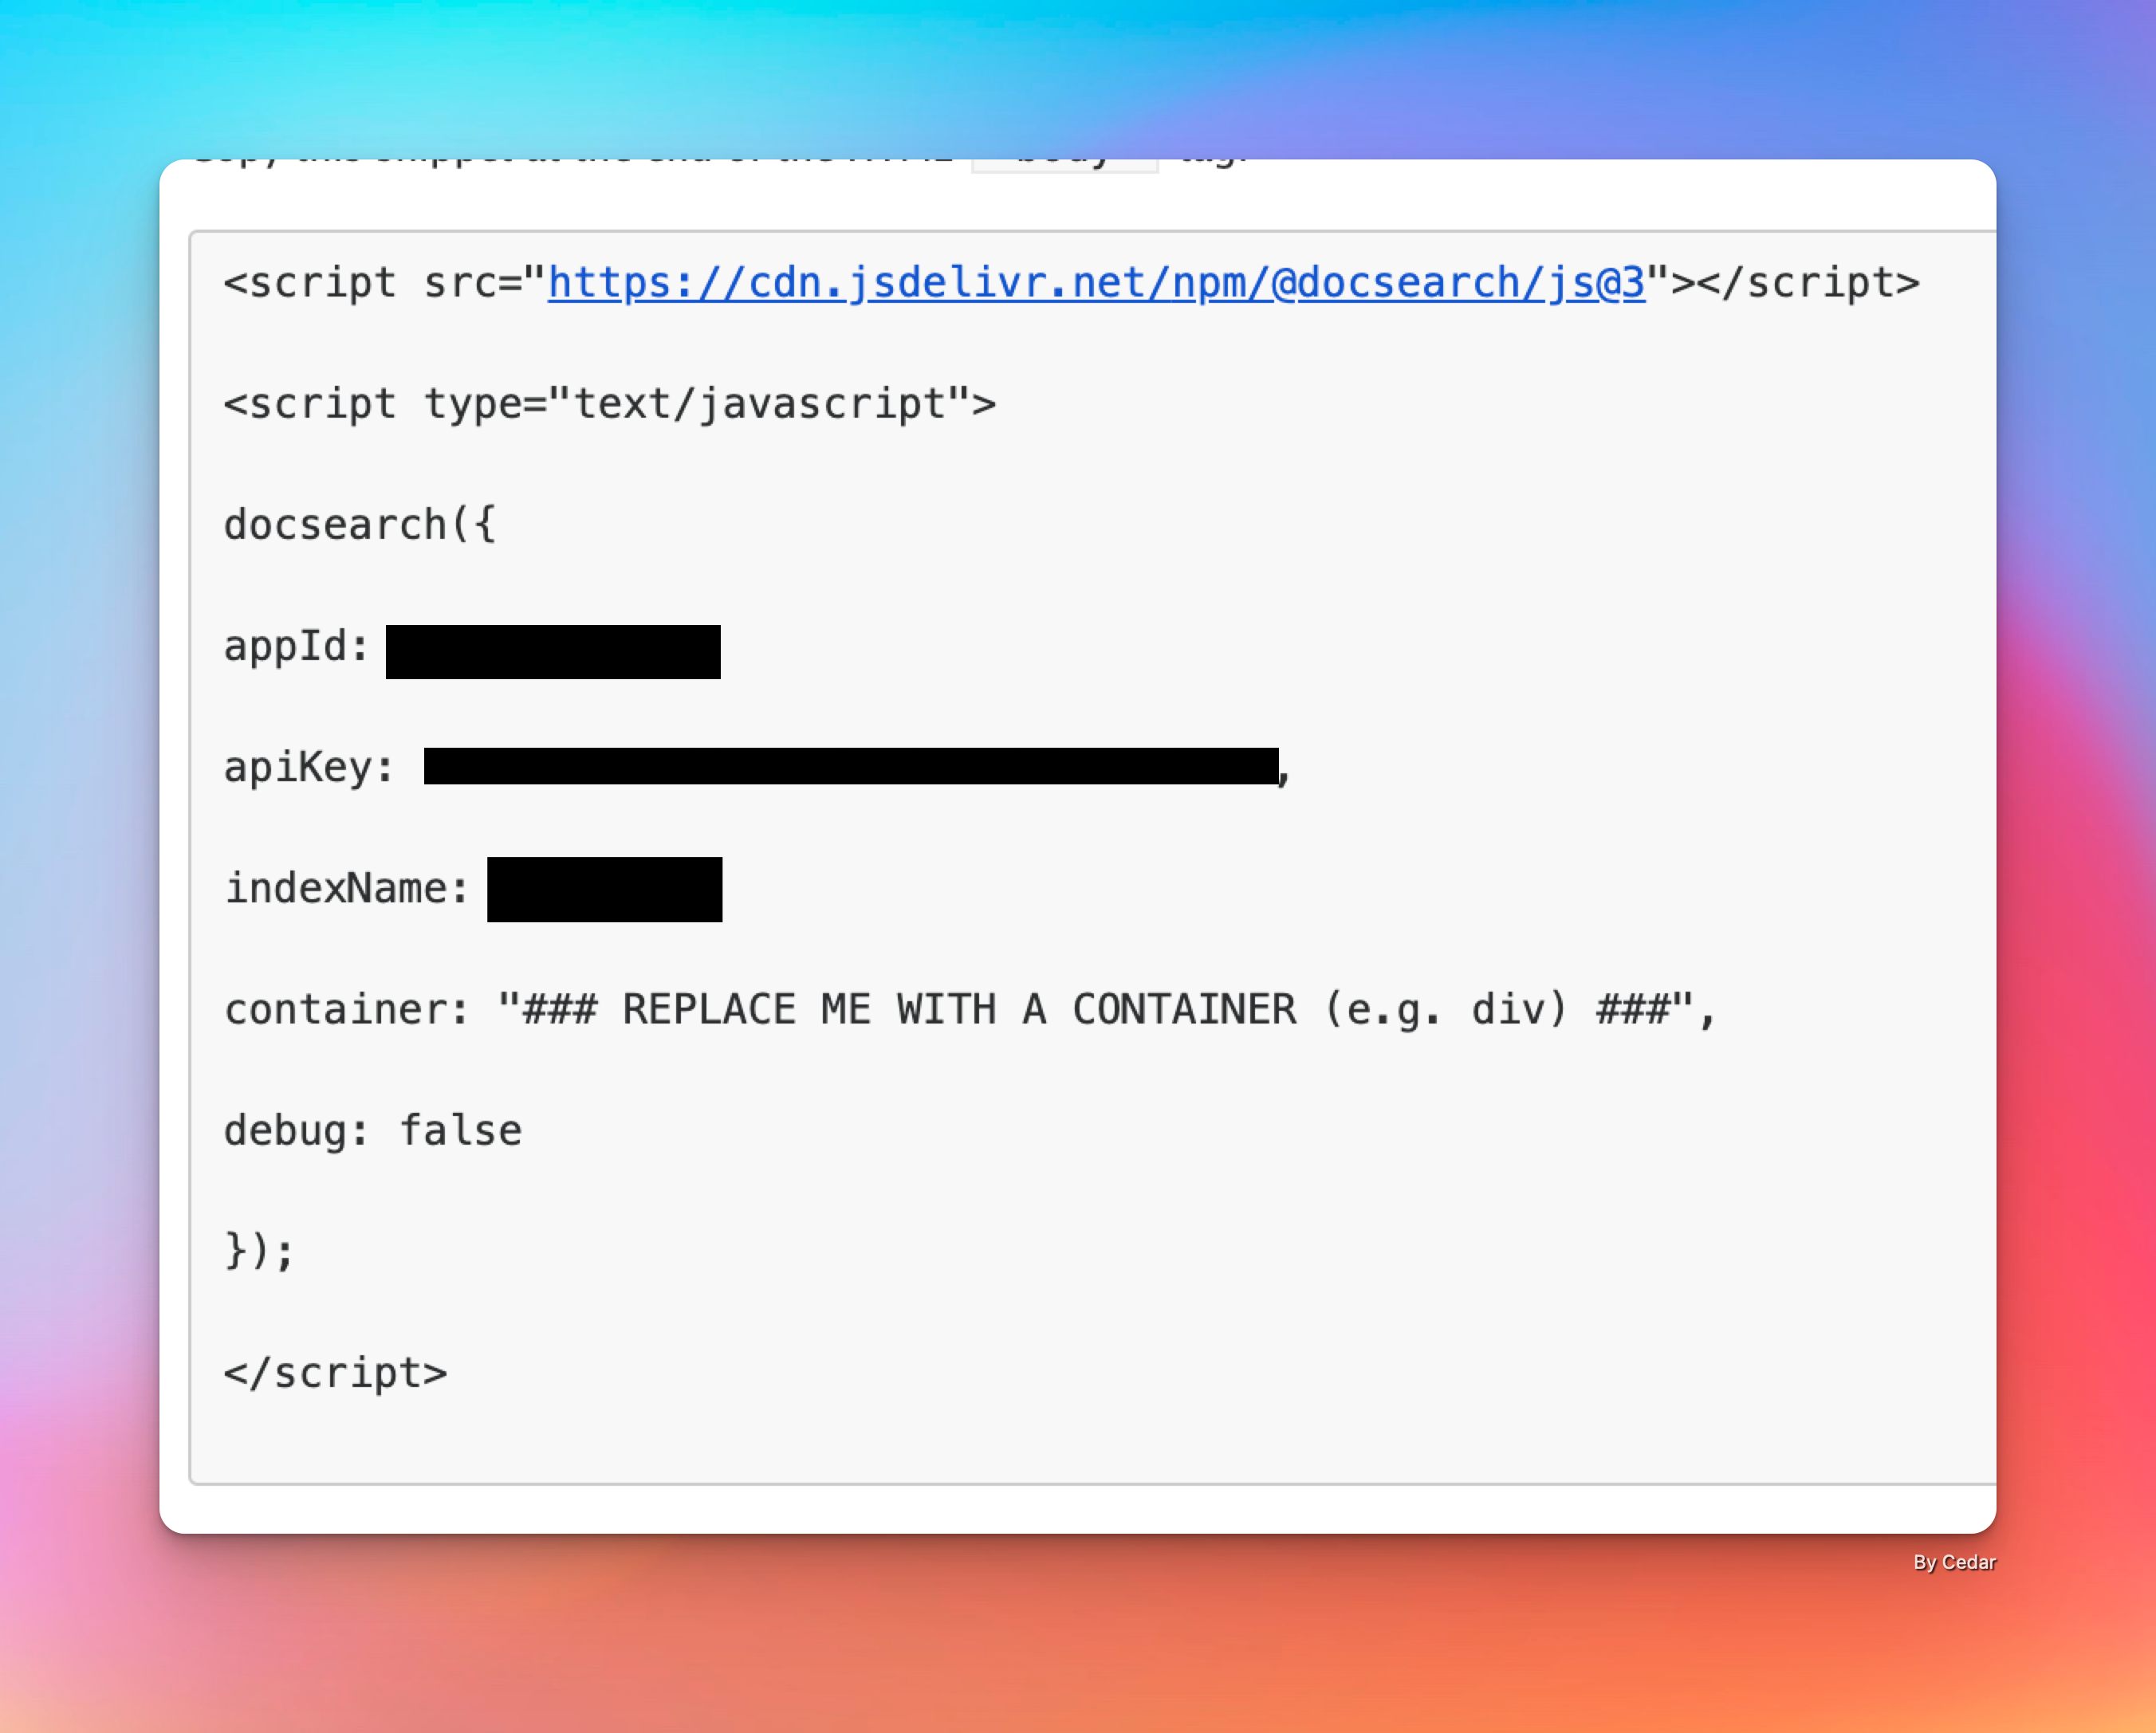
大概1-2天就能收到反馈,我申请的比较顺利,可能就20分钟便收到了通过的邮件。邮件中会包含相应的配置信息,很重要。
接入 DocSearch 服务
网站使用了 React 技术,只需要安装 @docsearch/react@3 、@docsearch/css@3 两个包就能快速部署。
pnpm add @docsearch/react@3 @docsearch/css@3编写相应的 Search 组件,使用邮件中的参数替换相应的配置信息,具体内容可以参见官方文档。
import { DocSearch } from '@docsearch/react';
import '@docsearch/css';
import 'style/docsearch.css';  //自定义样式,适配网站风格

function App() {
  return (
    <DocSearch
      appId="YOUR_APP_ID"
      indexName="YOUR_INDEX_NAME"
      apiKey="YOUR_SEARCH_API_KEY"
    />
  );
}

export default App;
调整样式参数,匹配网站主题,可参见 @docsearch/css@3。
:root {
--docsearch-primary-color: rgb(84, 104, 255);
--docsearch-text-color: rgb(28, 30, 33);
--docsearch-spacing: 12px;
--docsearch-icon-stroke-width: 1.4;
--docsearch-highlight-color: var(--docsearch-primary-color);
--docsearch-muted-color: rgb(150, 159, 175);
--docsearch-container-background: rgba(101, 108, 133, 0.8);
--docsearch-logo-color: rgba(84, 104, 255);
/* modal */
--docsearch-modal-width: 560px;
--docsearch-modal-height: 600px;
--docsearch-modal-background: rgb(245, 246, 247);
--docsearch-modal-shadow:
inset 1px 1px 0 0 rgba(255, 255, 255, 0.5), 0 3px 8px 0 rgba(85, 90, 100, 1);
/* searchbox */
--docsearch-searchbox-height: 56px;
--docsearch-searchbox-background: rgb(235, 237, 240);
--docsearch-searchbox-focus-background: #fff;
--docsearch-searchbox-shadow: inset 0 0 0 2px var(--docsearch-primary-color);
/* hit */
--docsearch-hit-height: 56px;
--docsearch-hit-color: rgb(68, 73, 80);
--docsearch-hit-active-color: #fff;
--docsearch-hit-background: #fff;
--docsearch-hit-shadow: 0 1px 3px 0 rgb(212, 217, 225);
/* key */
--docsearch-key-gradient: linear-gradient(
-225deg,
rgb(213, 219, 228) 0%,
rgb(248, 248, 248) 100%
);
--docsearch-key-shadow:
inset 0 -2px 0 0 rgb(205, 205, 230), inset 0 0 1px 1px #fff, 0 1px 2px 1px rgba(30, 35, 90, 0.4);
/* footer */
--docsearch-footer-height: 44px;
--docsearch-footer-background: #fff;
--docsearch-footer-shadow: 0 -1px 0 0 rgb(224, 227, 232), 0 -3px 6px 0 rgba(69, 98, 155, 0.12);
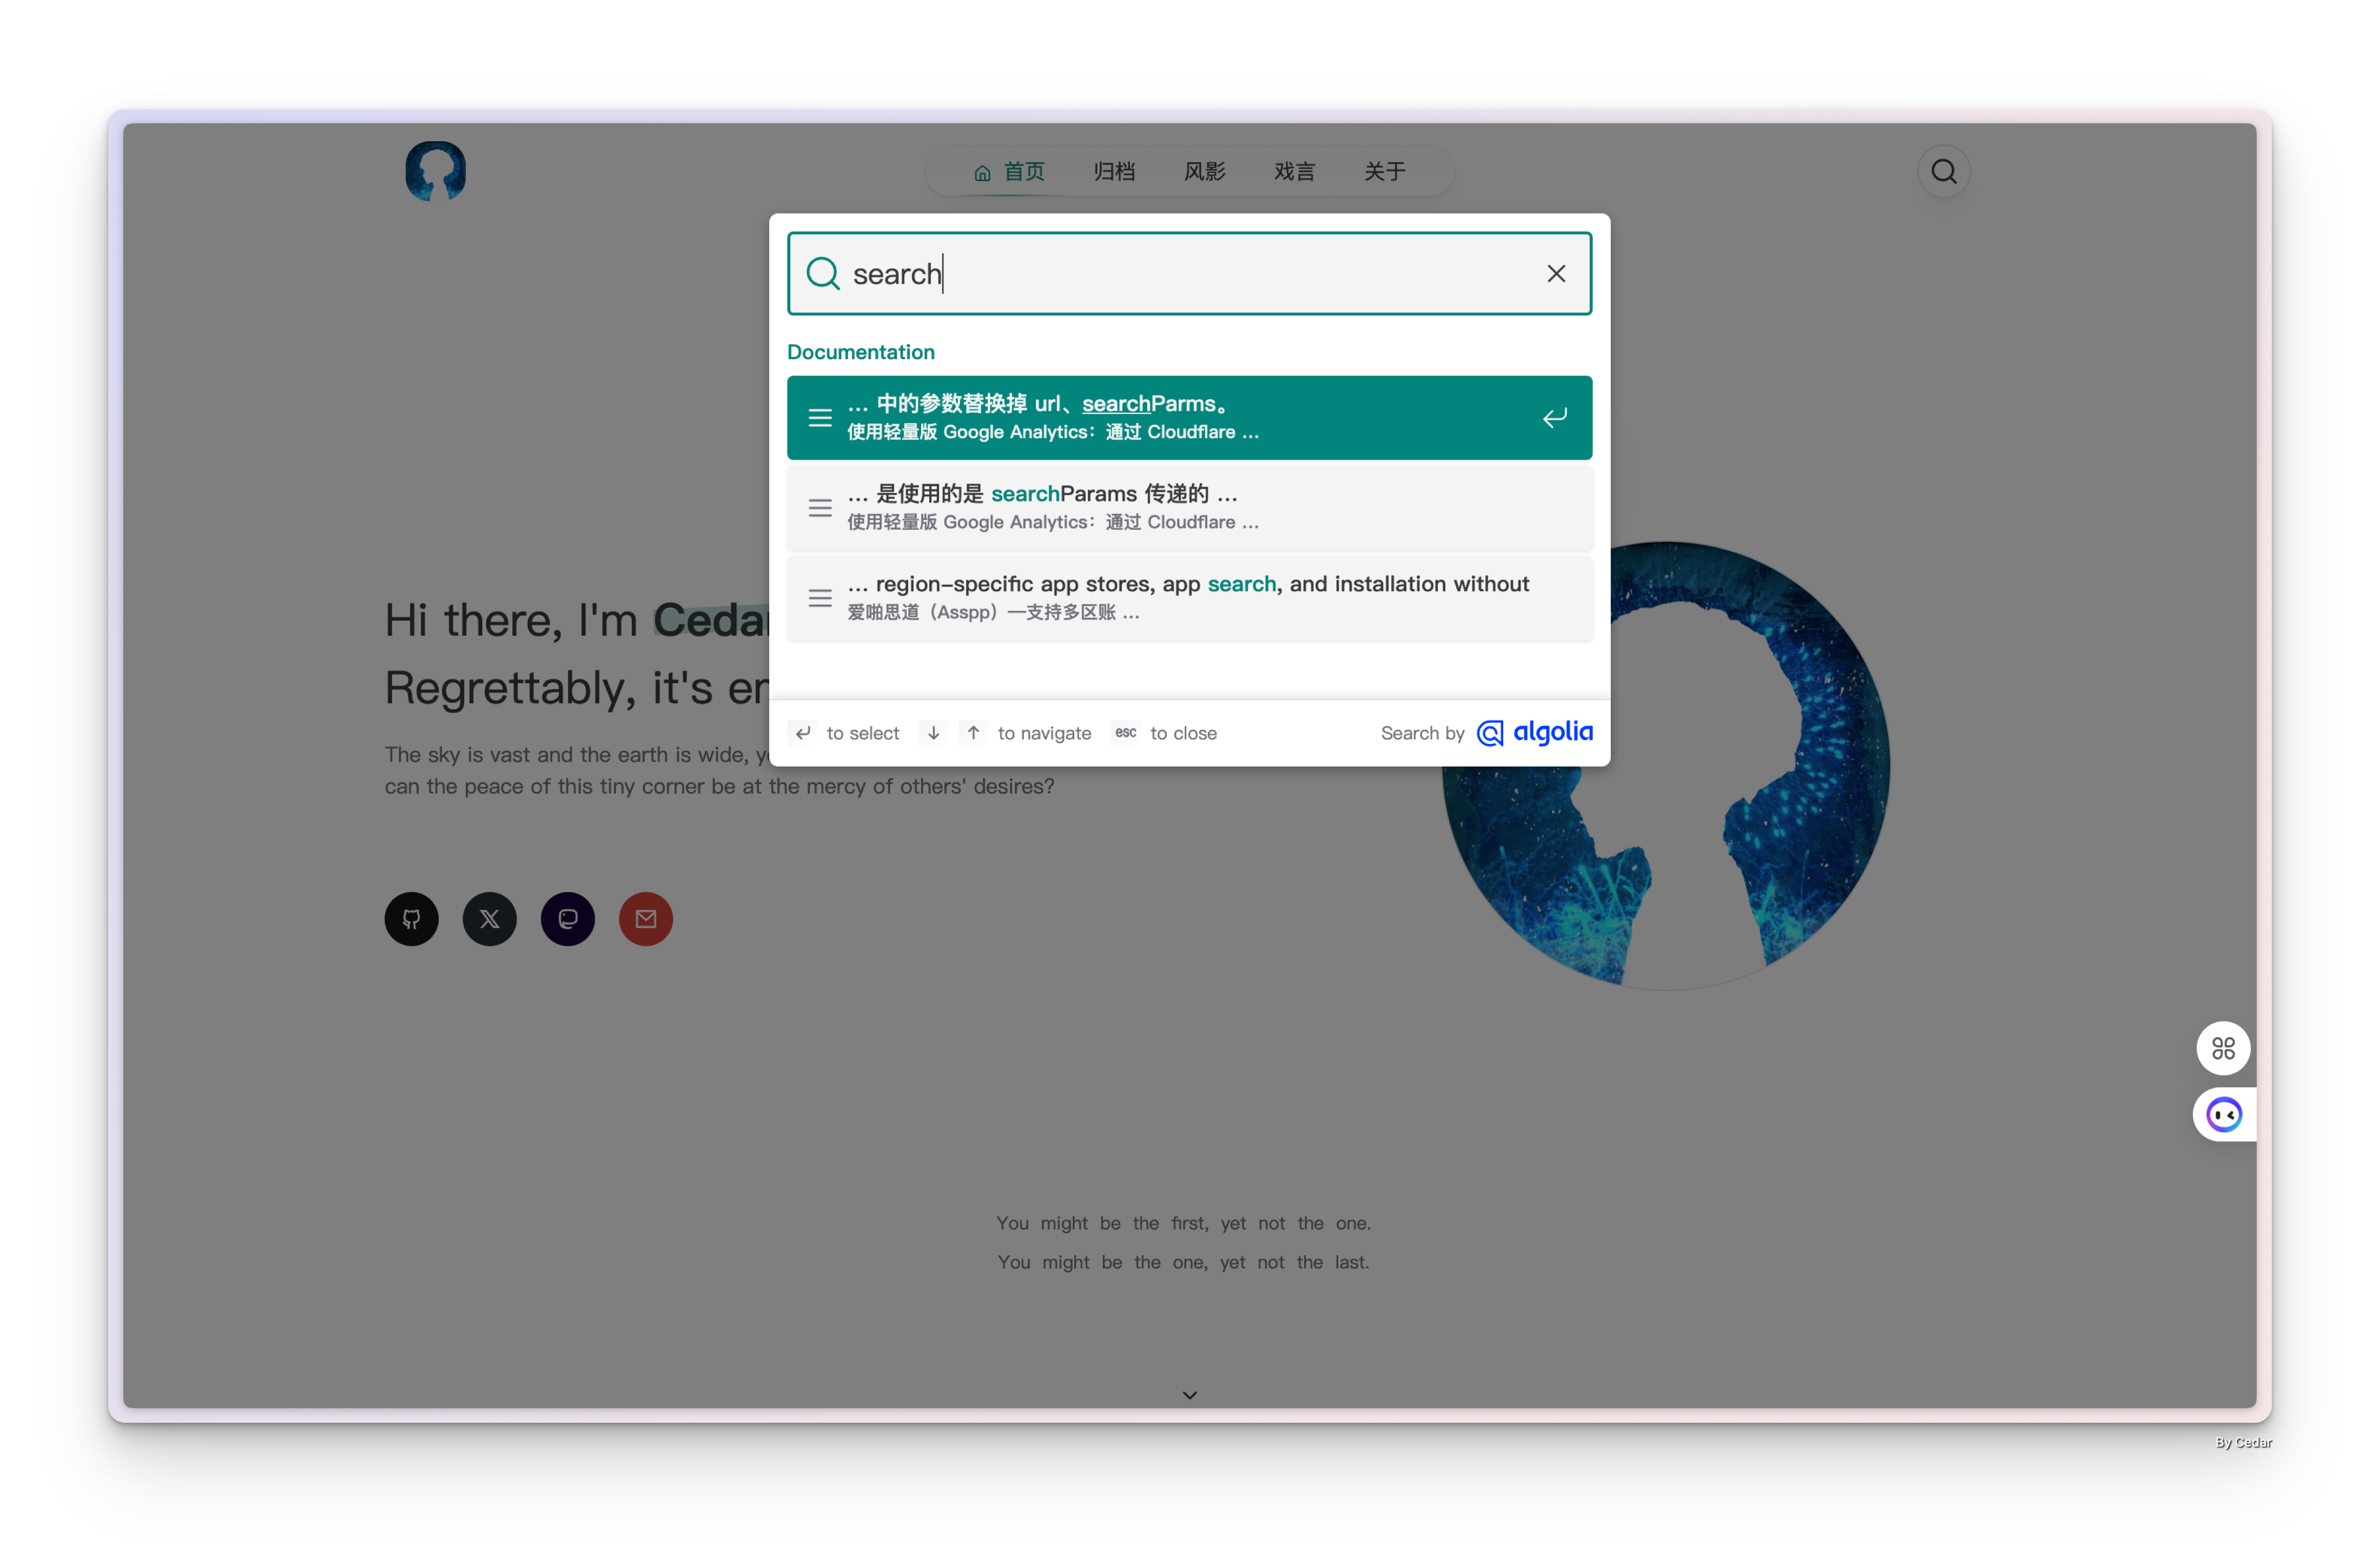
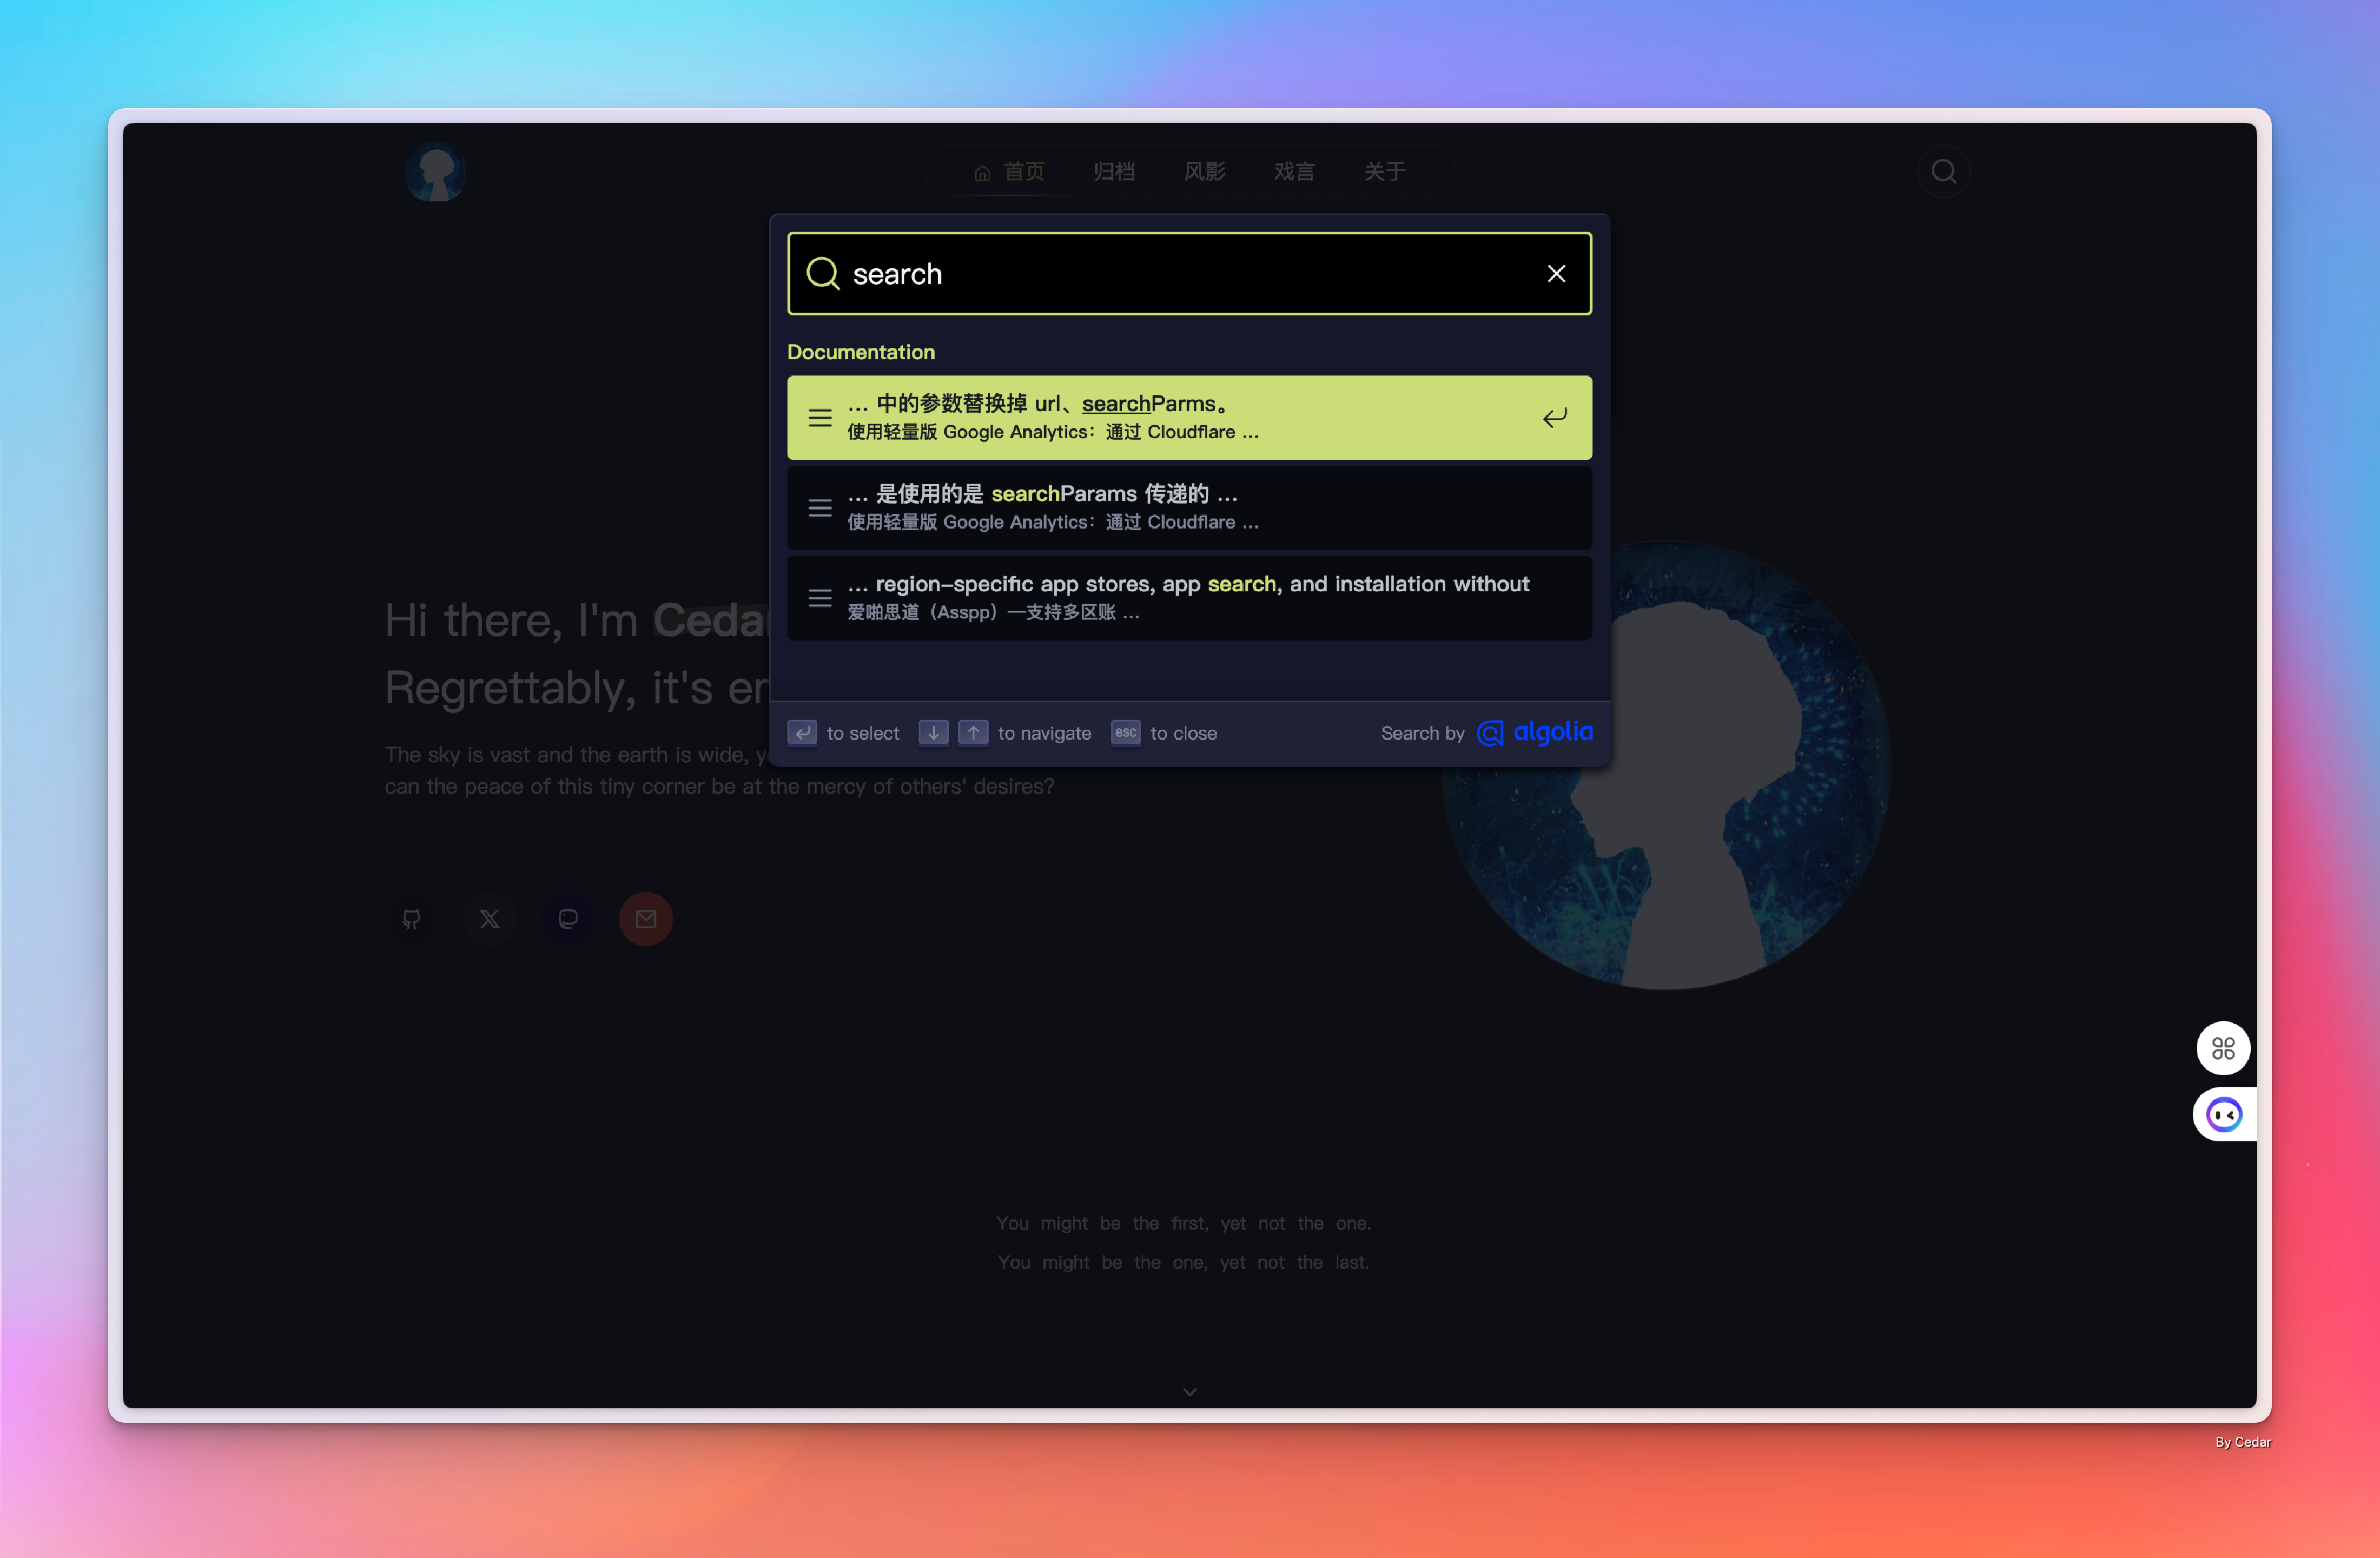
}使用了网站主题中的 Tailwind 变量做了修改,最终效果和主题样式统一。
爬虫配置
可以使用申请开通时使用的邮箱登录 Crawler 管理后台进行相应设置,比如条目限制、Javascript 功能等。
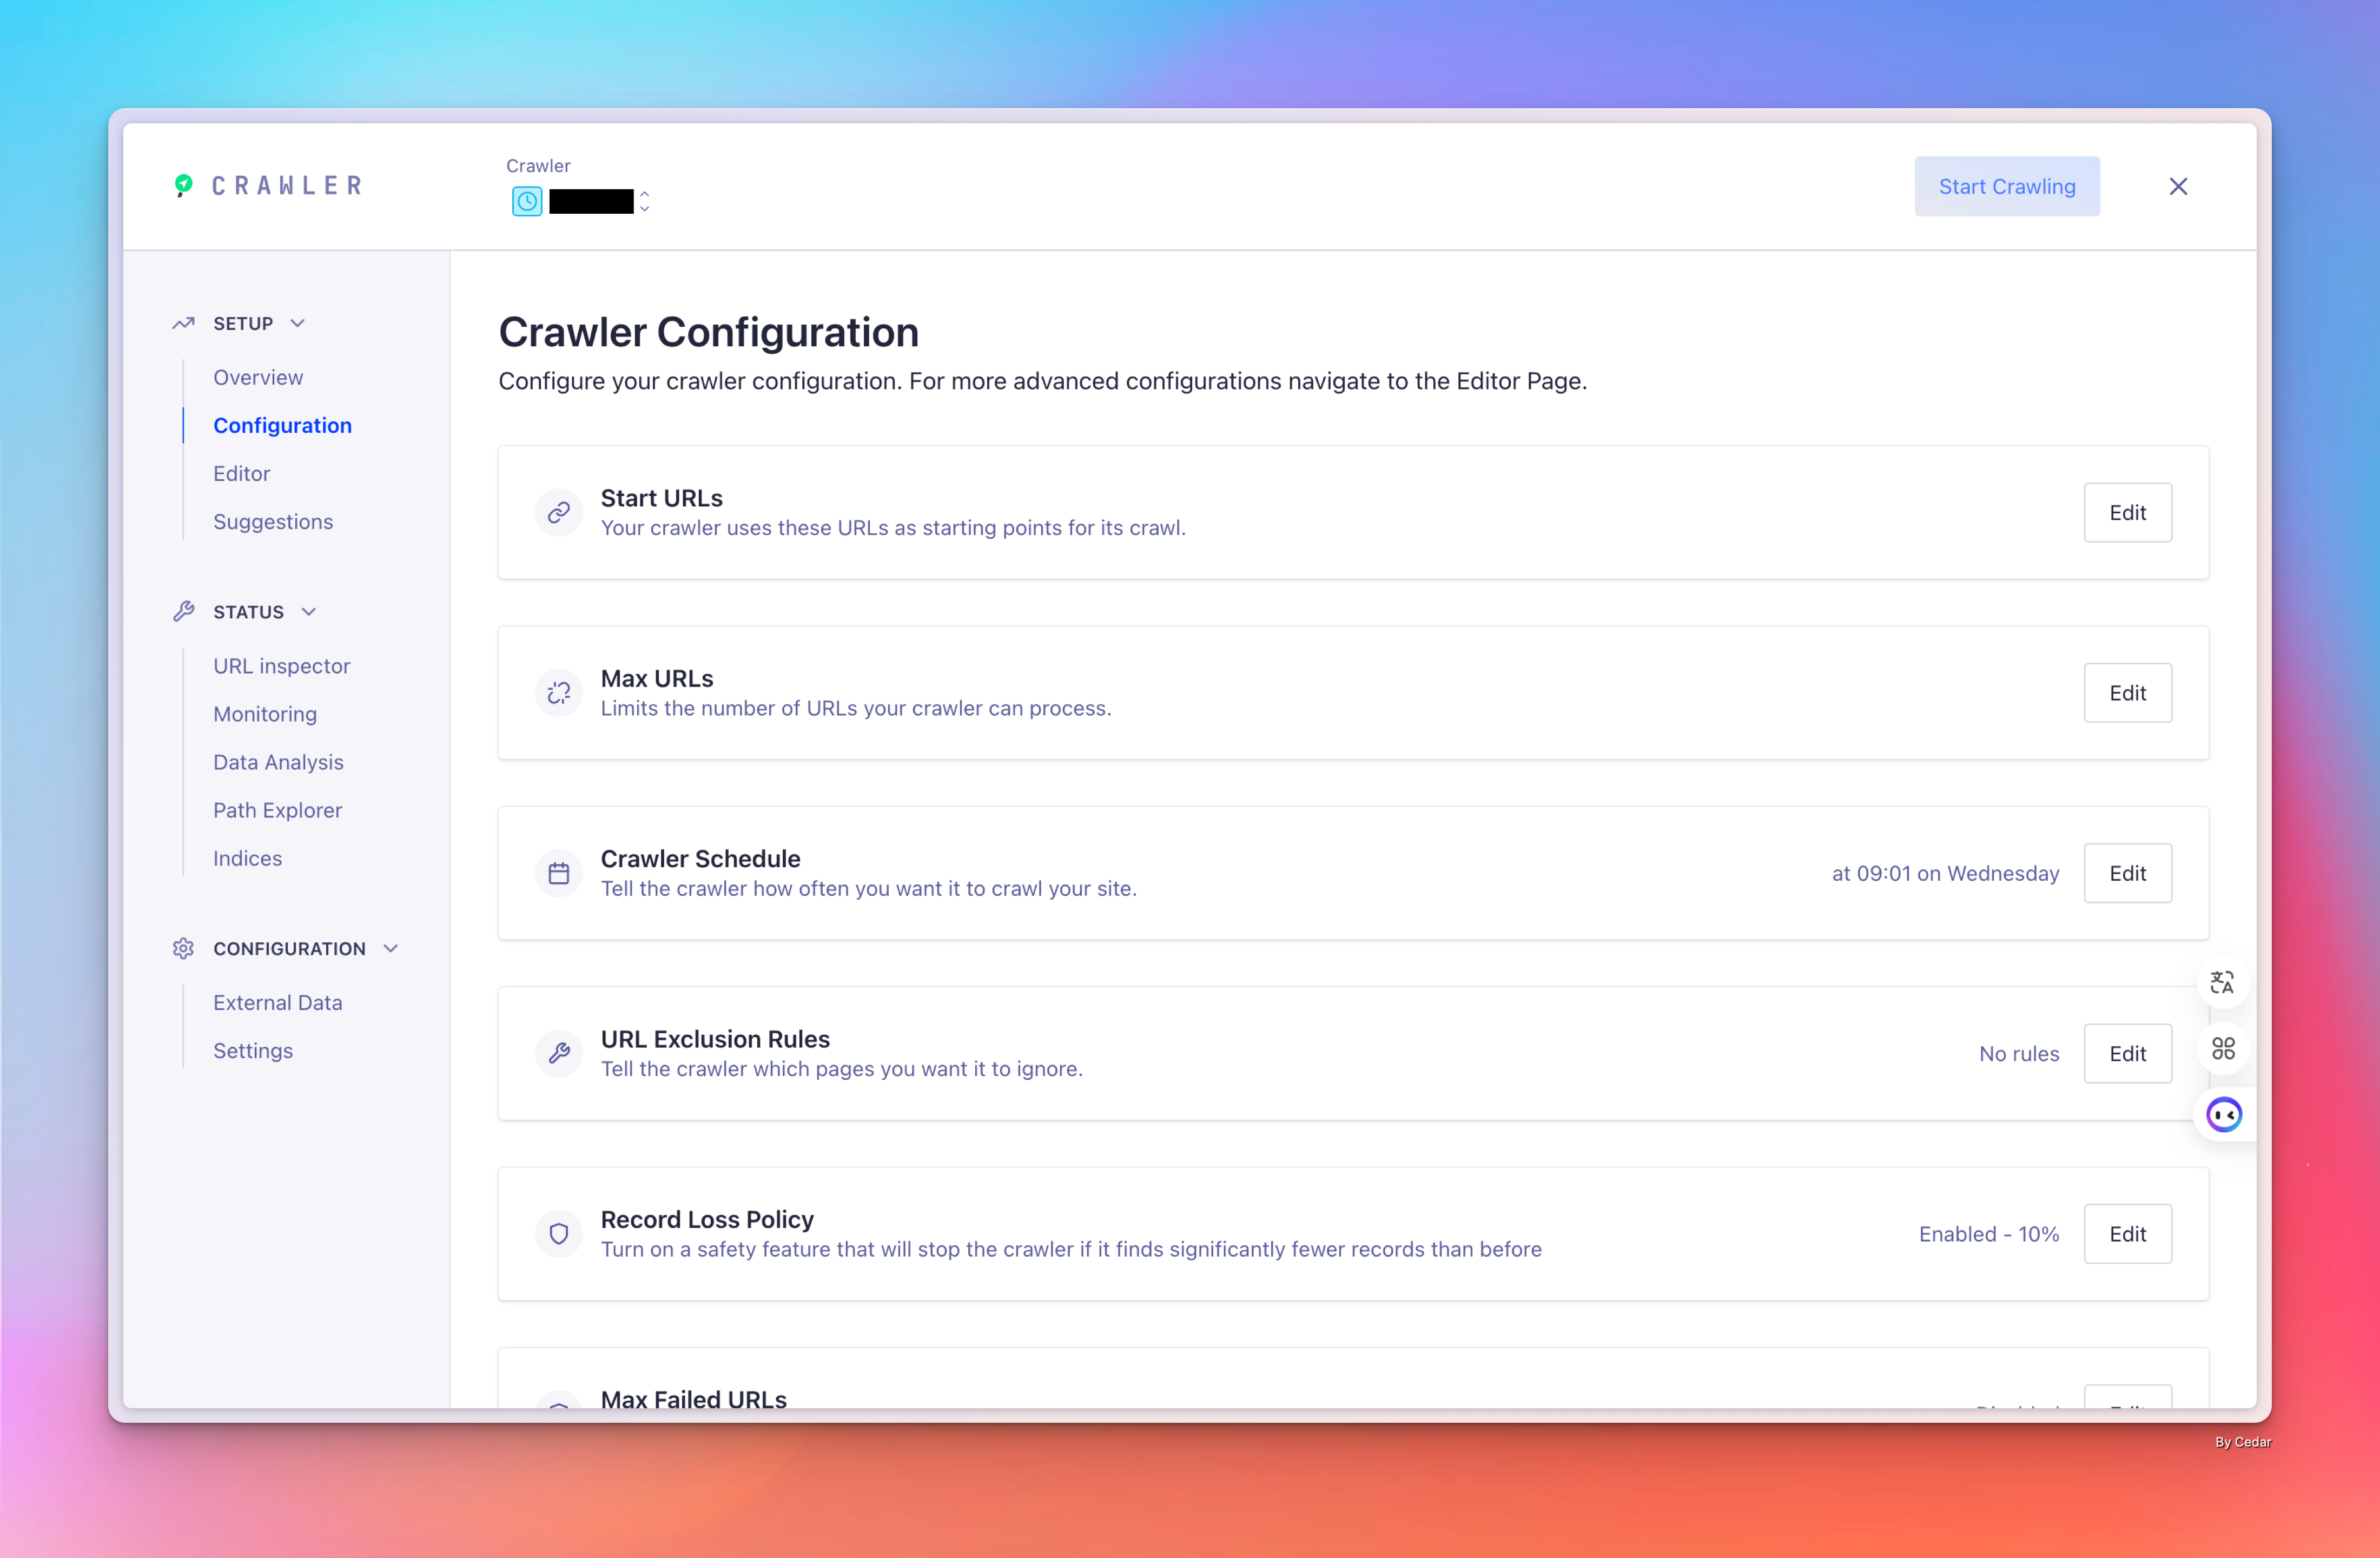
也可以使用配置文件进行更详细的管理,比如 Sitemap 的指定、爬取规则的调整,根据网站实际情况调整就可以。
new Crawler({
  appId: 'YOUR_APP_ID',
  apiKey: 'YOUR_API_KEY',
  maxUrls: null,
  indexPrefix: '',
  rateLimit: 8,
  renderJavaScript: true,
  startUrls: [
    // 这是 Algolia 开始抓取网站的初始地址
    'https://YOUR_WEBSITE_URL/',
  ],
  discoveryPatterns: [
    // 这是 Algolia 抓取 URL 的范围
    'https://YOUR_WEBSITE_URL/**',
  ],
  exclusionPatterns: [
    // 阻止 Algolia 抓取某些 URL
  ],
  //爬取时间设置
  schedule: 'at 15:01 on Wednesday',
  maxDepth: 10,
  actions: [
    {
      indexName: 'YOUR_INDEX_NAME',
      // 索引生效的路径
      pathsToMatch: ['https://YOUR_WEBSITE_URL/**'],
      recordExtractor: ({ helpers }) => {
        return helpers.docsearch({
          recordProps: {
            lvl1: ['header h1', 'article h1', 'main h1', 'h1', 'head > title'],
            content: ['article p, article li', 'main p, main li', 'p, li'],
            lvl0: {
              selectors: '',
              defaultValue: 'Documentation',
            },
            lvl2: ['article h2', 'main h2', 'h2'],
            lvl3: ['article h3', 'main h3', 'h3'],
            lvl4: ['article h4', 'main h4', 'h4'],
            lvl5: ['article h5', 'main h5', 'h5'],
            lvl6: ['article h6', 'main h6', 'h6'],
          },
          aggregateContent: true,
          recordVersion: 'v3',
        })
      },
    },
  ],
  sitemaps: [
    //提供 Sitemap 链接
    'https://YOUR_WEBSITE_URL/sitemap-index.xml',
    'https://YOUR_WEBSITE_URL/sitemap.xml',
  ],
  initialIndexSettings: {
    fylsen: {
      advancedSyntax: true,
      allowTyposOnNumericTokens: false,
      attributeCriteriaComputedByMinProximity: true,
      attributeForDistinct: 'url',
      attributesForFaceting: ['type', 'lang'],
      attributesToHighlight: ['hierarchy', 'content'],
      attributesToRetrieve: ['hierarchy', 'content', 'anchor', 'url', 'url_without_anchor', 'type'],
      attributesToSnippet: ['content:10'],
      camelCaseAttributes: ['hierarchy', 'content'],
      customRanking: ['desc(weight.pageRank)', 'desc(weight.level)', 'asc(weight.position)'],
      distinct: 1,
      highlightPostTag: '</span>',
      highlightPreTag: '<span class="algolia-docsearch-suggestion--highlight">',
      ignorePlurals: true,
      minProximity: 1,
      minWordSizefor1Typo: 3,
      minWordSizefor2Typos: 7,
      ranking: ['words', 'filters', 'typo', 'attribute', 'proximity', 'exact', 'custom'],
      removeWordsIfNoResults: 'allOptional',
      searchableAttributes: [
        'unordered(hierarchy.lvl0)',
        'unordered(hierarchy.lvl1)',
        'unordered(hierarchy.lvl2)',
        'unordered(hierarchy.lvl3)',
        'unordered(hierarchy.lvl4)',
        'unordered(hierarchy.lvl5)',
        'unordered(hierarchy.lvl6)',
        'content',
      ],
    },
  },
  ignoreCanonicalTo: false,
  safetyChecks: { beforeIndexPublishing: { maxLostRecordsPercentage: 10 } },
})
配置相关内容,参考了 Hexo 集成 Algolia 实现站内搜索。
最后
目前在搜素准确性上是比较满意的,但是真要很好的体验,确实需要投入比较多的时间去调整,爬虫的配置还是不太容易。另外在使用过程中也发现了一个样式问题,DocSearch 的结果并非相对链接,在与 swup 的协同并不容易,最后用了 window.location.href 的方式依然没能解决。